Digital menu boards have moved from a nice-to-have to the default way restaurants merchandise a menu. This guide is the full setup walkthrough: what hardware to buy, how to size and mount screens, how to pair a player with a 4-digit code, how to build your first menu layout, how to schedule dayparting, and how to roll the same boards out to every location.
Everything below is how we actually deploy menu boards for quick-service, fast-casual, cafe, and drive-thru operators, using E Display software at $8 per screen per month. If you only want the numbers, the digital menu board cost guide breaks pricing down line by line.
What is a digital menu board?
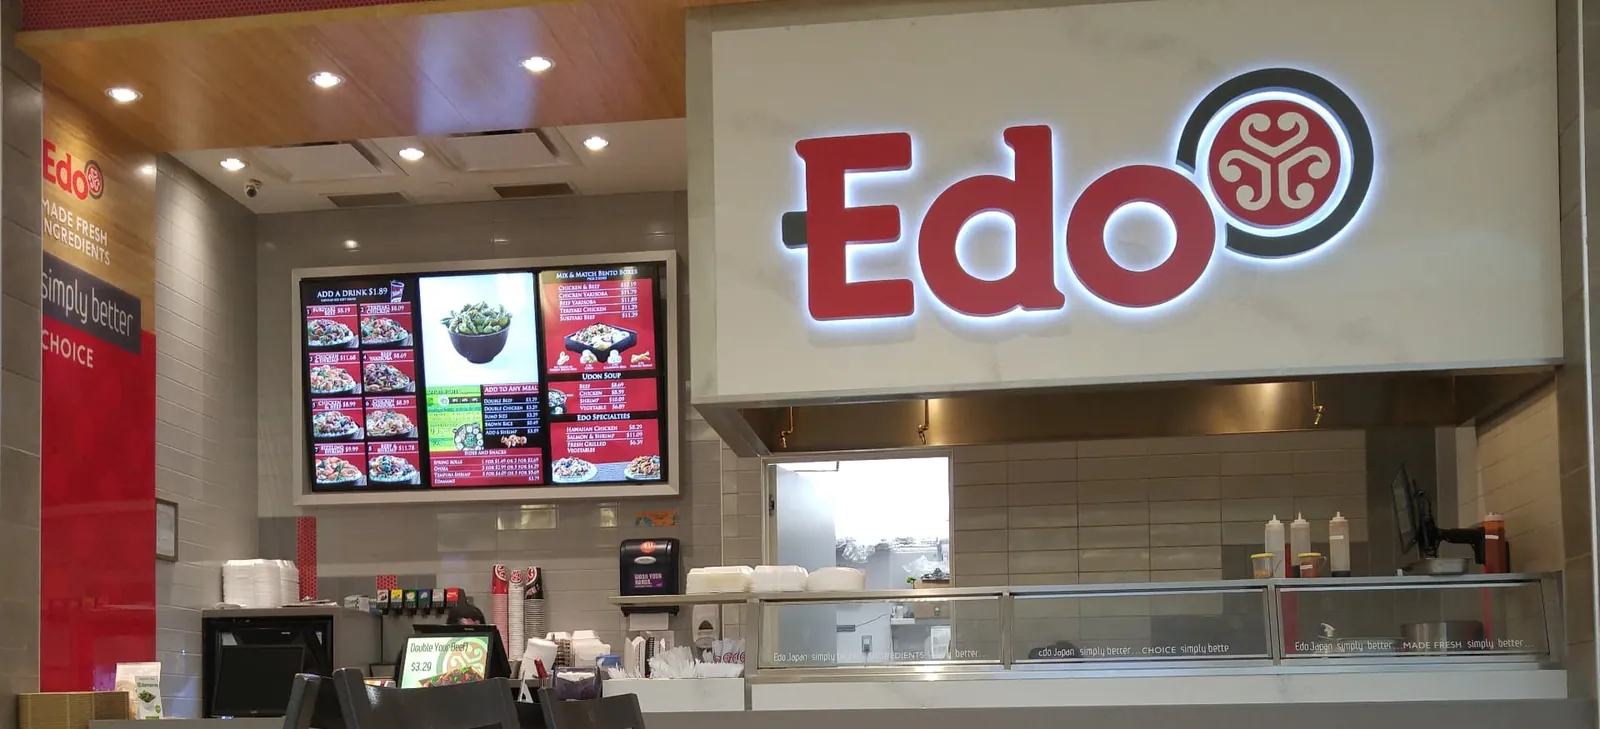
A digital menu board is a commercial display, usually mounted above the counter or at a drive-thru, that shows your menu from a cloud content management system instead of a printed panel. Prices, items, photography, and promotions are updated remotely and appear on every screen in every location within seconds. The screen is driven by a small media player, so the display itself never needs to be replaced when your menu changes.
Why restaurants move from static to digital
- No reprint cost or lead time. A price change costs nothing and takes a minute.
- Dayparting: breakfast, lunch, and late-night menus switch automatically on a schedule.
- Instant 86'ing. Pull a sold-out item off every screen before the next order is taken.
- Motion and food photography make high-margin items far easier to sell than text on a printed board.
- Compliance: calorie counts, allergen notes, and local pricing stay accurate across locations.
- One brand standard. Head office controls the template; stores cannot break the layout.
What you need before you start
Commercial displays
Rated for 16/24 hour operation with portrait support. Consumer TVs fail early above a kitchen line and most warranties void in portrait.
A media player per screen
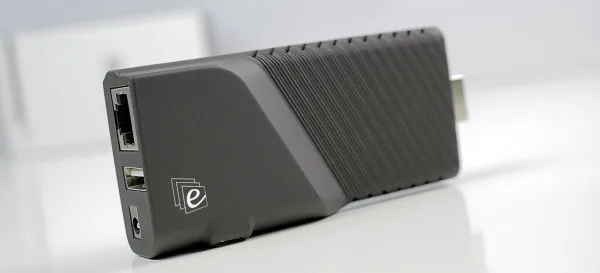
The E Display media player plugs into HDMI and powers from USB. Android, Windows, Chrome OS, and Raspberry Pi are also supported: see digital signage media player options.
Menu software and templates
Scheduling, multi-location groups, and menu layouts you can edit without a designer. Start from the digital signage template library.
Network and power
Wired ethernet where possible, Wi-Fi otherwise. Content keeps playing from local cache if the connection drops.
Step 1: size and position the screens
Sizing is driven by the distance from the furthest point in your queue to the board. The rule of thumb we use is roughly one inch of capital letter height for every 10 feet of viewing distance, which sets the display size once you know how many items each screen carries.
| Viewing distance | Display size | Typical use |
|---|---|---|
| 6-10 ft | 32-43" | Cafe counter, single-screen menu |
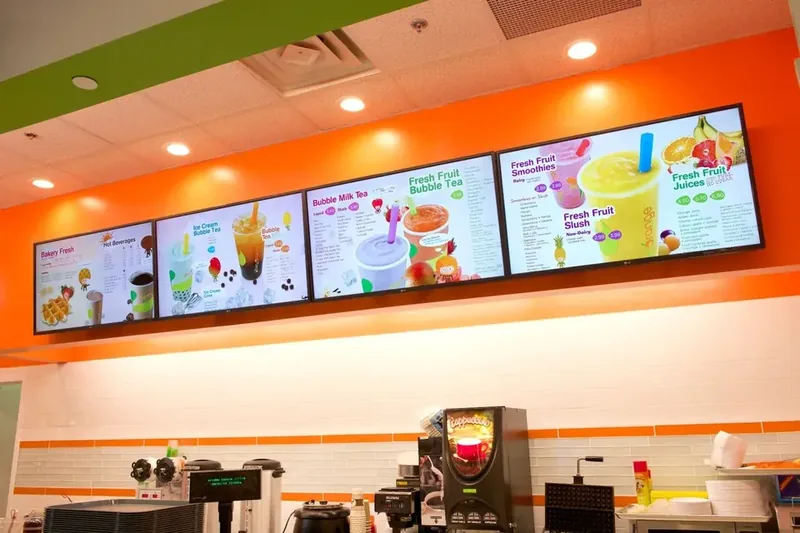
| 10-16 ft | 43-55" | Standard QSR counter, 3-screen bank |
| 16-24 ft | 55-65" | Large counter, food hall, cafeteria line |
| Outdoor drive-thru | Weather-rated 46-55", high brightness | Drive-thru order point and pre-sell board |
Swipe the table sideways to see all columns.
- Mount the bottom edge of the board no lower than 6 ft so guests at the front of the line do not block it.
- Portrait screens fit narrow soffits and read well for category lists; landscape suits promotions and combos.
- Leave the same bezel gap between screens in a bank so a three-screen layout reads as one board.
- Keep the player and power behind the display, and confirm there is a receptacle before installation day.
Step 2: pair the player with a 4-digit code
Setup is deliberately short: nothing needs to be configured on the display itself.
- Plug the media player into the display's HDMI port.
- Follow the initial setup prompts to join Wi-Fi or connect ethernet.
- The player shows a 4-digit pairing code on screen.
- Enter that code in your E Display account to claim the screen and name it (for example "Front counter - left").
- The assigned scene downloads and starts playing automatically. Repeat per screen.
The full walkthrough with screenshots lives on digital signage setup walkthrough.
Step 3: build your first menu layout
Do not port a printed menu verbatim. Screens read differently: fewer items, larger type, and one clear focal point per board.
A layout that works for a three-screen counter
| Screen | Content | Notes |
|---|---|---|
| Left | Core categories and prices | Static, easiest to scan first |
| Centre | Hero promotion or signature item | The only screen with motion |
| Right | Combos, drinks, desserts | The decision zone after a main is chosen |
Swipe the table sideways to see all columns.
- Keep each screen to 7-9 items. Crowded boards measurably slow ordering down.
- Set prices in a consistent column, without leader dots, and drop the currency symbol if every price shares it.
- Use high contrast and avoid pure white fills in dim dining rooms.
- Restrict motion to one zone at a time so the eye is not competing with itself.
- Photograph food in the same lighting for every item, or use the supplied template imagery consistently.
Step 4: schedule dayparting
Dayparting is where digital pays for itself. Build one playlist per daypart, then attach a schedule so the boards change themselves.
| Daypart | Window | What the board shows |
|---|---|---|
| Breakfast | open - 10:30 | Breakfast items, coffee attach, no burgers |
| Lunch | 10:30 - 15:00 | Combos front and centre, fastest tickets |
| Afternoon | 15:00 - 17:00 | Snacks, cold drinks, loyalty promotion |
| Dinner | 17:00 - close | Family bundles, desserts, higher-margin mains |
Swipe the table sideways to see all columns.
Set the schedule once at the group level rather than per screen. New stores inherit it the moment their players are paired, which is what makes a 50-location rollout manageable.
Step 5: keep prices in sync
- Decide who owns price edits: head office only, or store managers within a range.
- If your POS exports a price file, feed it into the menu template so a single update flows to every screen.
- Use location groups for regional pricing instead of duplicating the whole menu.
- Audit boards against the POS monthly. Mismatched prices are the most common guest complaint after a rollout.
Drive-thru boards: what changes
- Use weather-rated, high-brightness displays. Standard indoor panels wash out in direct sun and fail in freeze-thaw cycles.
- Split content between a pre-sell board (promotions before the order point) and the order confirmation menu.
- Fewer items still: drive-thru guests read for seconds, not minutes.
- Plan conduit and power early; drive-thru installs are civil work, not a wall mount.
The impact on sales
Operators typically track three numbers after a rollout: average order value, attachment rate on combos and add-ons, and order time at the counter. Promoting a combo with motion in the top-right decision zone is the single most common lift driver, because it is where guests look after choosing a main. Featuring high-margin drinks and desserts by daypart is second. Faster reads at the board also shorten queues, which matters more than it sounds during a lunch rush.
Common mistakes to avoid
- Porting a printed menu to a screen verbatim instead of designing for the format.
- Animating every element. Constant motion makes the board harder to read.
- Skipping the daypart schedule and swapping content manually each morning.
- Using consumer TVs, especially in portrait orientation.
- No process for keeping prices in sync with the POS.
- Mounting too low, so the queue blocks the board it is meant to read.
Frequently asked questions
How long does it take to set up a digital menu board?
A single screen takes about 15 minutes once it is mounted: plug in the player, connect it to the network, enter the 4-digit pairing code, and the assigned menu starts playing. Designing the menu layout itself is the longer task, typically an afternoon from a template.
What does a digital menu board cost?
Software is $8 per screen per month, the media player is free on annual plans, and commercial displays start around $495. The digital menu board cost guide gives per-screen totals at 1, 3, and 10 screens including mounting and design.
Do I need internet at every location?
Yes, for updates. But the player caches content locally, so menus keep playing normally if the connection drops and sync resumes automatically when it returns.
Can I use a regular TV as a digital menu board?
You can, but we do not recommend it. Consumer TVs are rated for a few hours of daily use, are dimmer than commercial panels, and most warranties are void when mounted in portrait or run all day.
How many screens do I need above the counter?
Three is the standard quick-service bank: categories, hero promotion, combos and drinks. A cafe or small counter is often fine with one, and a food hall stall usually needs two.
Can prices be different at each location?
Yes. Build one master menu template and use location groups to override regional pricing and local promotions while every board keeps the same brand layout.
Does it work with my POS?
Menu content can be driven by a price or item feed exported from your POS so a single update reaches every screen. Talk to us about your specific system and we will confirm the feed format.
Next steps
E Display supplies the displays, the media player, the cloud software, and ready-to-use restaurant menu templates, with free shipping across the US and Canada. See the full digital menu boards solution, browse the digital signage template library, or book a 20-minute demo and we will map a layout to your menu.
Ready to plan your menu boards?
Tell us how many screens and locations you have and we will send back a layout plan and a per-screen quote.
Still choosing a vendor? Compare digital signage platforms head to head, run your own numbers with the digital signage budget calculator, or see our digital signage pricing at $8 per screen per month with a free media player.
Related digital signage solutions
- Digital menu board software for restaurants Dynamic menus that sell more.